
Beginners Guide to Polymer Clay
Working with polymer clay for the first time can be the most fun but then the most frustrating and sometimes dissappointing experience in crafting history. Let me tell you why:
1) We all remember mucking about with clay as a kid and it was easy then because it didnt matter how it turned out.
2) Its messy, the colours go EVERYWHERE and its impossible to keep fuzzies off it no matter how clean your work surface is.
3) 99% of people burn the first things they make and never pick the bleedin' stuff up again thinking they are a failure.
Time to rectify that....

So you've chucked everything in a draw never to be seen again, had your little paddy and have breathed enough (or had a large gin) to try again.
Let's talk tools:
A list of things I highly recommend you purchase are as follows:
1) A large ceramic tile sample with a SMOOTH FLAT SURFACE. This will be your work surface so get a big one.
2) 1 or 2 smaller ceramic tiles for baking - or any that will fit in the oven you intend to use.
3) Acrylic Rolling Pin
4) Tissue blade
5) Set of dotting tools and/or clay tools - not essential but cheap
5) Pasta machine - not essential but very highly recommended
6) Oven Thermometer - CRUCIAL to your baking success
7) Optional - desktop toaster oven
8) Small bottle of 99% isopropyl alcohol
9) Small bottle of 100% Acetone
10) Baby wipes, cotton buds, kitchen paper & lint free wipes are always handy too.
Choosing your clay.
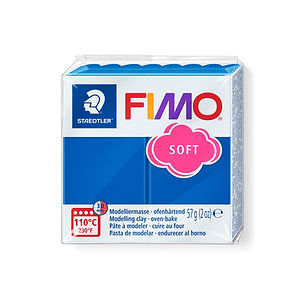
There are many different polymer clays available on the market but I would suggest that you buy a block or 2 of the brand you intent to use to see how you get on with it. Some are harder to use than others, and some are just downright poor quality so avoid any cheap craft store style clays and stick with brands such as FIMO, Sculpey or Cernit.
Don't be tempted to rush and buy ALL THE CLAY as you may find you don't like one particular brand and get on better with another. White, Black and the three primary colours Red, Yellow and Blue are the most sensible to choose to begin with as you can blend them to make almost any colour you wish - but be careful, not all brands have true primary colours.


Condidtioning your clay.
This step cannot be avoided if you want your finished pieces to be successful. We see so many videos of people on social media cutting clay straight from the block and using it but they have missed this vital step which could potentially lead to failure down the line.
All polymer clay must be conditioned before use otherwise it will crumble and snap once baked. This simply means that is worked into a soft malleable form by repeated rolling. Here is where a pasta machine really comes in handy and will save you a bunch of time and effort and make working with clay much more comfortable for you.
The process:
1) Cut a section of clay from your block and handle use your rolling pin to flatten it a bit if necessary.
2) Run it through your pasta machine on the widest setting once.
3) Fold it in half (only once), run it through your pasta machine again making sure you put the folded edge in first - this will avoid unwanted air bubbles to be trapped in the clay. When you get more experienced you can fold one side in, then the other side and run it through with the open sides down if you wish.
4) Repeat this step around 20 times. No that isn't a typo, 20 is a good number to make sure its conditioned properly. You'll get the feel for it the more you work with the clay. Every block will be different so this comes with experience.
EXPERT TIP: Your clay should feel smooth and look a bit more glossy. If you bend it and it cracks really easily, or is still crumbly you'll need to keep conditioning it. If it is really hard its worth putting it in a ziplock bag and warming it in your hands or even sitting on it for a few minutes!
The fun bit
Now you have your clay prepared you can lay it onto your (cleaned) work surface. I use the Isopropyl alcohol for this as it evaporates quickly so it doesn't leave the surface wet which can effect your clay.
Gently lay your clay on and make sure it is flat. Roll over it gently with your rolling pin so it is well adhered to your tile.
Choose your weapon (cutter) and get to work! Be sure to see the handy "using our cutters" section available here for more tips and advice to get the best results.
If you get annoying fuzzies (bits of lint, dust or debris) on your clay try gently removing with a cotton bud dipped in Isopropyl alcohol before you bake. Be careful not to press an dent your beautiful creation.
Use the tissue blade to very carefully slice the shape off the tile (these are killer sharp so don't cut yourself) and place it gently onto one of your baking tiles. This should be done with the blade as close to the work surface as possible to avoid chopping into the clay. It also helps sometimes to use a sawing back and forth motion and start from the widest point of your shape if you can. If you are using cutters that are likely to distort when you move them you can cut them directly on the tile you are baking with to avoid damaging the shape.
Lay your shapes onto your baking tile ready for the oven. I ALWAYS make some pilot holes where my connectors are going to go with a toothpick or metal awl to make drilling much easier after they have been baked. This is a great habit to get into.
EXPERT TIP: place on a piece of clean printer paper (on top of your baking tile) underneath your clay to achieve a smooth finish to the back of your pieces.
The All Important Bake
*WARNING*
If you don't get yourself and oven thermometer and do some tests prior to baking your clay you are very unlikely to succeed!
I highly recommend buying a toaster oven to bake your pieces rather than using your normal oven. Check your clay packet for instructions - some are in Fahrenheit too so don't mix them up! Run it at least 50 degrees cooler than your recommended baking heat for about 10-15 minutes with your oven thermometer in and see what the temperature gets to. Tweak until the temperature on your thermometer (not your oven!) is correct for the clay you are using.
In my experience it is better to bake slightly cooler for longer to avoid burning. It is wise to do a few experiments and bake a few off cuts first to avoid any issues. I personally ALWAYS make a little foil tent for them to avoid burning (especially with paler colours) and cook them for a good hour but you'll find your own way as you go along.

Foil tent for my toaster oven
Use an upturned foil takeaway tin or scrunch 3 sides of your foil to make a little "tent"
Cover your clay without it touching for the duration of baking to avoid any burning and colour changes.
This also helps the clay cook more evenly.
Once your pre-checks are complete you can pop your tile in the oven ready for baking. This is why I have a second baking tile so I can still be working on the next batch in while the other cooks!
Once finished allow your clay to fully cool. You can take your tile out of the oven for this. The clay will still be quite soft and flexible when warm so don't be tempted to prod it or remove it too soon as it can damage what you have just made.
This concludes the beginners guide to clay section. If you've made it this far BRAVO! I hope you have made something you are proud of.
Remember - Every expert was once a beginner!
If you want to take your clay journey to the next level be sure to check out our next tutorial sections:
How to use our cutters - tips and tricks on getting the best from your purchases.
Finishing your jewellery - Here we cover sanding, drilling, resin, embedding, removing annoying fuzzies and how to assemble your pieces.
Happy Crafting,
Helena xx